How to Install U Channel Sign Posts

U Post Installation - Hammering the base post
Need to provide helpful signage to protect vehicles and passengers on your properties, or maybe increase efficiency of traffic? You can do that with U Channel Post sign systems. In this article, you’ll learn which posts to buy, as well as 5 common ways they are installed.

Disclaimer

Franklin Industries in no way provides any warranty, express or implied, towards the content of instructions in this website. It is the reader’s responsibility to determine the value and quality of any instructions provided for U Post installation and to determine the safety of the instructions. 
 
The instructions presented are intended for informational purposes and for use by persons having appropriate technical skill, at their own discretion and risk of property damage and personal injury.  

Select your post

If you are hanging signs, it’s recommended that you use 2LB or heavier posts. The lighter posts are not meant for signage, more for small markers. For heavy-duty projects, use 4LB posts. 

Most contracts or municipalities govern the types of posts used. However, if you’re looking for the best longevity, galvanized posts are preferred. Powder coated U Posts are the second-best choice for longevity, but have the largest selection of colors.  

Make sure it's safe

Before driving any posts, contact the proper channels to make sure that the area doesn’t have gas, electric, or other utilities underground. 

Choose your configuration

The contract or municipality usually outlines what configuration should be used. However, if you have the choice, there are a few options available. 
 
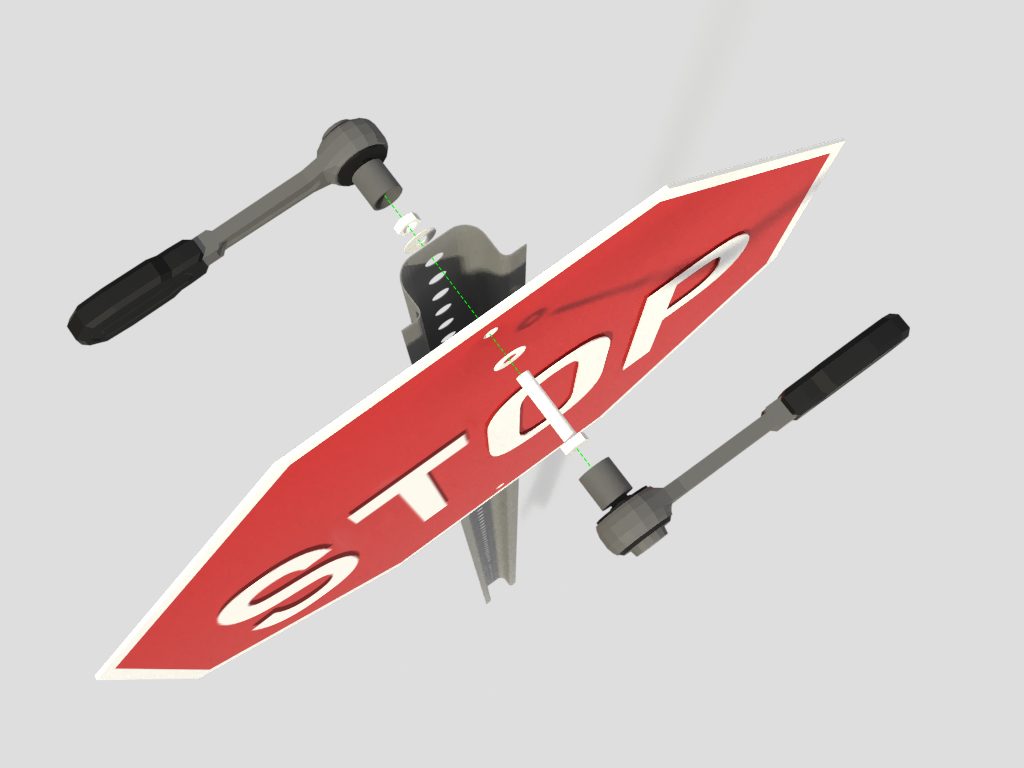
Base-bolted sign systems are engineered to strategically break upon impact to limit damage to vehicles and injury to passengers. They are also a great way to avoid using ladders and other methods that decrease safety for workers. 
 
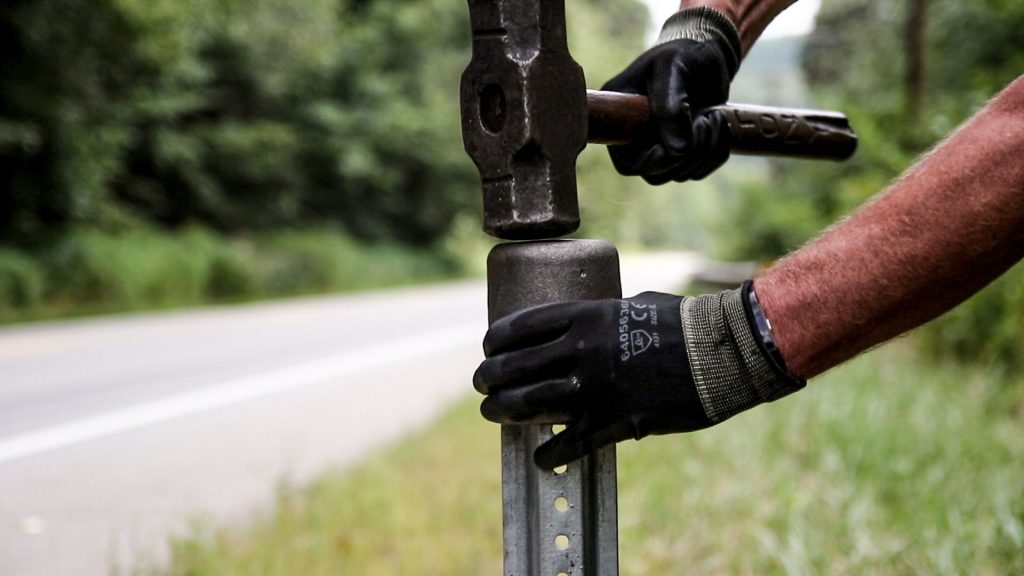
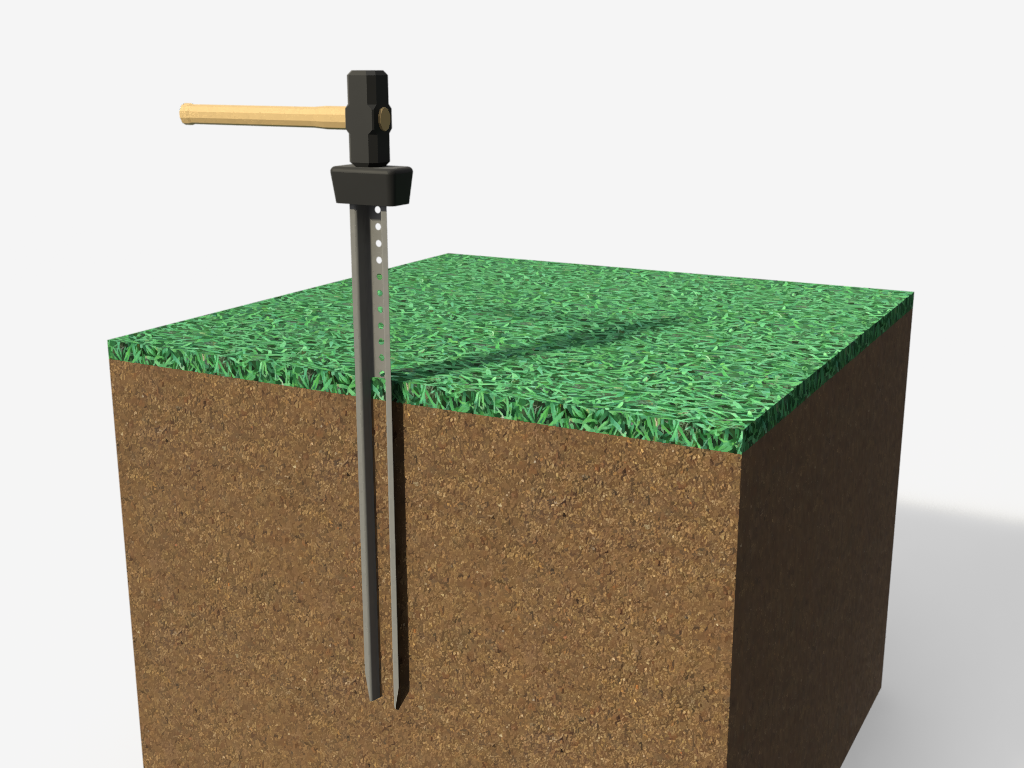
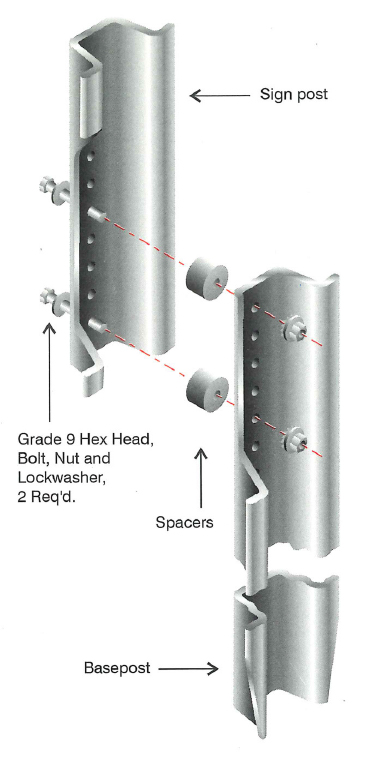
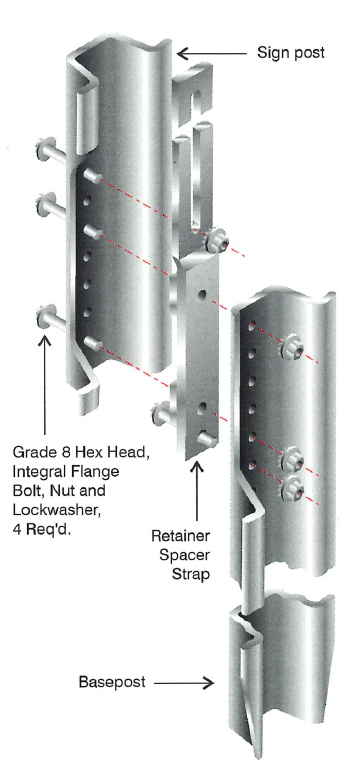
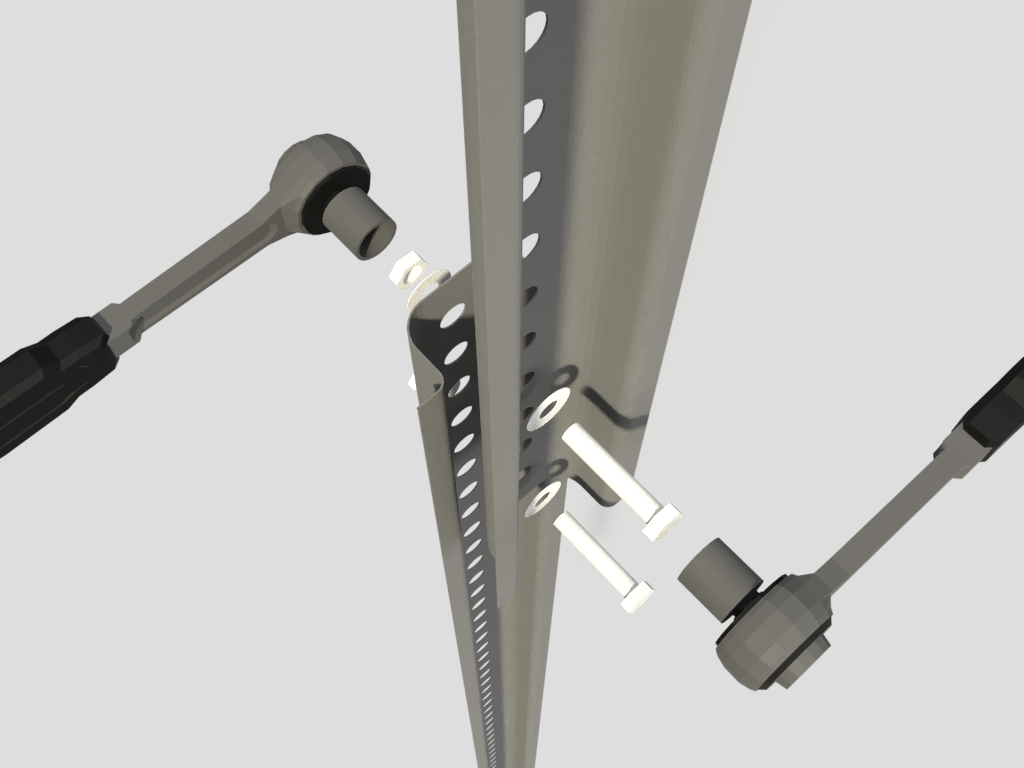
The combine method is another good way to avoid ladders and other less-safe methods of driving U Channel Sign Posts when you aren’t using base-bolted systems. You can achieve this by bolting together two shorter U Channel Sign Posts. 
 
In instances when you have to stand on a ladder or other structure to drive a post, it’s recommended that you, instead, use a powered post driver for safety. 

How deep to drive

When you install signage, you want to make sure that they will remain standing. The consequences of say, a stop sign falling over, can be quite grave. 
 
As a good rule of thumb, one-third of the post should be in the ground. If you live in an area with deep frost line, then the posts need to be below the frost line to prevent frost heave. Frost heave is when the water in the soil expands during freezing and squeezes objects out of the ground. See a frost-line map here.

Menu

How to Install a Break-away U Channel Sign Post

U Post Installation - Hammering the Base Post

What you'll need:

  • Safety Boots
  • Safety Glasses
  • Hard Hat
  • Heavy Duty Gloves
  • Marker
  • Level
  • Franklin Industries U Channel Sign Posts with a break-away base system
  • Signage
  • Wrenches or Ratchets
  • Nuts, bolts, and washers
  • Drive Cap
  • One-handed Sledge Hammer
  • One-handed hand clamp with rubber pads 

Step 1 – Mark your spot

After you’ve checked to make sure there is no underground infrastructure, use the can of spray marking paint to designate the point that you will be driving the post. If you forgot your paint, you can use the heel of your boot to dig a small hole to serve as a marker.

Step 2 – Mark your drive depth

Use your tape measure and marker to mark the drive depth on the base post. 

Step 3 – Drive in the base post

Set the drive cap on top of the base post. Place the bottom of the base post, tapered end down, at the spot you want to drive with the open face of the channel pointing to where you want to display the signage. 
 
Hold the base post with one hand and strike the the drive cap with the sledge hammer until the U Post has been driven in several inches. Use your level to check plumbness on two perpendicular sides.
 
If your post is plumb, finish driving the post until you’ve reached the drive depth. 

Step 4 - Attach your signage to the top post

U Post Assembly - Sign
Place the sign on the open side of the U Post. This gives the sign three points of contact for proper support.
 
For convenience, use the one-handed hand clamp to hold the sign to the U Post until you’re finished bolting. 
 
Follow the diagram above to complete this step. 

Step 5 – Attach the top post

U Post Bolted Sign System
Refer to the proper diagram above to assemble the break-away base system. 
 
Use your wrenches to secure the bolts.

How to Install U Channel Sign Posts with a Long Handled Post Driver

T Post Installation

What you'll need:

  • Safety Boots
  • Safety Glasses
  • Hard Hat
  • Heavy Duty Gloves
  • Marker
  • Level
  • Franklin Industries U Channel Sign Posts
  • Signage
  • Wrenches
  • Nuts, bolts, and washers
  • Long-handled Post Driver
  • One-handed hand clamp with rubber pads

Step 1 – Mark your spot

After you’ve checked to make sure there is no underground infrastructure. Use the can of spray marking paint to designate the point that you will be driving the post. If you forgot your paint, you can use the heel of your boot to dig a small hole to serve as a marker.

Step 2 – Mark your drive depth

Use your tape measure and marker to mark the drive depth on the post. 

Step 3 – Drive in the base post

Put the tapered end of the U Post on your marker with the open side of the U Post facing the signing display direction. 
 
Put the post driver on top of the U Post and drive it in several inches. Use your level on two perpendicular sides to check plumbness. You may have to have an assistant help you with the post if you have to re-adjust alignment or overcome small rocks or impediments. 
 
If your post is plumb, finish driving the post until you’ve reached your drive depth.

Step 4 - Attach your signage

U Post Assembly - Sign
Place the sign on the open side of the U Post. This gives the sign three points of contact for proper support.
 
For convenience, use the one-handed hand clamp to hold the sign to the U Post until you’re finished bolting. 
 
Insert the bolts into the face of the sign, through the U Post openings and finish bolting on the sign. 

How to Install U Channel Sign Posts by Joining Two Together

U Post Assembly

What you'll need:

  • Safety Boots
  • Safety Glasses
  • Hard Hat
  • Heavy Duty Gloves
  • Marker
  • Level
  • 2 Franklin Industries U Channel Sign Posts
  • Signage
  • Wrenches
  • Nuts, bolts, and washers
  • Post driver
  • One-handed hand clamp with rubber pads

Step 1 – Mark your spot

After you’ve checked to make sure there is no underground infrastructure. Use the can of spray marking paint to designate the point that you will be driving the post. If you forgot your paint, you can use the heel of your boot to dig a small hole to serve as a marker.  

Step 2 – Mark your drive depth

Use your tape measure and marker to mark the drive depth on the base post.

Step 3 – Drive in the base post

Put the tapered end of the U Post on your marker with the open side of the U Post facing the signing display direction. 
 
Put the post driver on top of the U Post and drive it in several inches. Use your level on two perpendicular sides to check plumbness. You may have to have an assistant help you with the post if you have to re-adjust alignment or overcome small rocks or impediments. 
 
If your post is plumb, finish driving the post until you’ve reached your drive depth.

Step 4 – Attach your signage

U Post Assembly - Sign
Place the sign on the open side of the top U Post. This gives the sign three points of contact for proper support.
 
For convenience, use the one-handed hand clamp to hold the sign to the U Post until you’re finished bolting. 
 
Insert the bolts into the face of the sign, through the U Post openings and finish bolting on the sign. 

Step 5 – Attach the top post

Refer to the proper diagram above to attach the top post. Overlap by at least 4 whole punches to secure the connection. 

How to Install U Channel Sign Posts with a Powered Post Driver

What you'll need:

  • Safety Boots
  • Safety Glasses
  • Hard Hat
  • Heavy Duty Gloves
  • Marker
  • Level
  • Franklin Industries U Channel Sign Post
  • Signage
  • Wrenches
  • Nuts, bolts, and washers
  • Powered Post Driver
  • One-handed hand clamp with rubber pads

Step 1 – Mark your spot

After you’ve checked to make sure there is no underground infrastructure. Use the can of spray marking paint to designate the point that you will be driving the post. If you forgot your paint, you can use the heel of your boot to dig a small hole to serve as a marker.

Step 2 – Mark your drive depth

Use your tape measure and marker to mark the drive depth on the post.

Step 3 – Drive in the base post

Put the tapered end of the U Post on your mark with the open side of the U Post facing the signing display direction. 
 
Put the post driver on top of the post and stand them up together. Begin driving the post while managing squareness. It’s recommended to work with one or more other people to quickly adjust the post angle while driving the post. 

Step 5 - Attach your signage

U Post Assembly - Sign
Place the sign on the open side of the U Post. This gives the sign three points of contact for proper support.
 
For convenience, use the one-handed hand clamp to hold the sign to the U Post until you’re finished bolting. 
 
Insert the bolts into the face of the sign, through the U Post openings and finish bolting on the sign.